Tuesday
Oct222019

plum jam

One of my friends at the rock gym mentioned plums were ripe in the area.  I knew there were plum trees on the esplanade down Heights.  The Heights association in my neighborhood has done a good job about planting trees.  There is also a foraging park south of where I live but I do not need to go there.  I just went for a walk with Bear after school.  I filled my portable container with plums.

The plum is a European plum, which is an old breed of plum tree.  The plums are very small.  The pit and pulp are about equal amounts.  Koda Bear and I picked up plums that were all levels of ripeness.  Some were so ripe that they were starting to ferment.  Some were not ripe at all.  They all went in the pot.

It is a lot of work to get all the pits out.

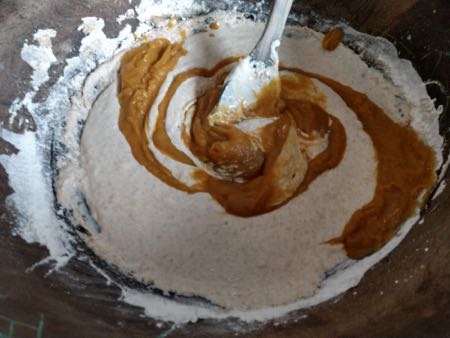
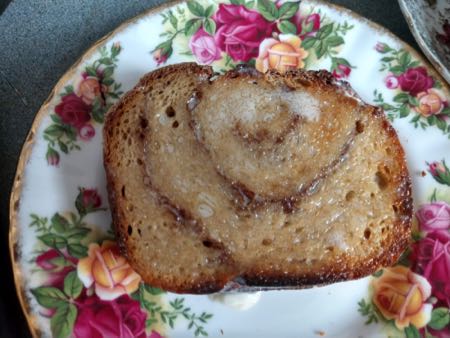
Very every cup of fruit I put in the pot, I put a half a cup of sugar.  I then cook until the jam is 220 degrees Fahrenheit or pours like a sheet (not drops) off a spoon that has been put in the freezer.  I have a decided that I really like jam that is not set too hard so I usually go for 200 to 210 degrees Fahrenheit if I am using a thermometer.  Looking at the jam come off the spoon, I am looking for the same consistency of jam that I wish to spread on toast.  

For five cups of fruit, I go almost three pints of jam.  This jam turned out sweeter then I expected.  The plums have a tartness to them but with all levels of ripeness and cooking, it mellows.

It is a memory for my Beloved.  His Grandma made plum jam and it was his favorite.  My best friend made greengage plum jam and it brought back memories even though it was bright green.  The European plum jam is not the same plums as Nanny had but the flavor is close.  Plums.  

We actually foraged plums yesterday and I made another batch of jam today.  Three and a half pints this time.  I think I had more help with the foraging.  

Saturday
Oct192019

Plans get turned on my head

Thursday, I am finished errands and planned to work on the sharpening truck.  As I was walking into the house, my Beloved waylays me and asks how would I go about building a display for knives for the Butchers' Ball.  He has sent me lots of examples but I am not sure I realized that a display was needed for this Sunday.

I took a mesquite log, an old walnut cutting board that was just too heavy to use, and some knife magnets.  I did a lot of sanding, cutting, and gluing.  There was some frustration.  There were questions in my head if I would get anything done in time.  But by this afternoon, I had a display built.

I took the mesquite log and sanded the heck out of it.  All the way up to 2000 grit.  I really wanted it to feel like a knife handle the boyos make since it was going to display their knives.  I then wiped it down with beeswax and mineral oil and sanded at 2500 grit.  The piece of wood turned out lovely.

I took that old walnut cutting board and cut it in half.  Then, I cut it with a 15 degree slope to one edge so the log would lean.  I sanded this a lot too.  But when I put up the two pieces of walnut, I realized that the were much too large for the log.  So I cut them kind of in half and glued all four pieces together.  Today, I sanded the heck out of them.  

I screwed and glued the strange walnut block into the back of the log.  That was frustrating.  I had two of the pieces of walnut split when I tried to screw them in.  Predrilling and a bit more patience made it work.  But that meant more sanding.

To hold the knives to the display, magnets were the choice.  But one old magnet needed to be cut in half.  The other old magnet needed to be shortened.  Again, I cleaned them up because they had been sitting in the shop for two years but then they needed to be cleaned up again after the magnets were cut.  More sanding!  My Beloved screwed them to the mesquite log and I sanded some more.

I wiped the whole display down with beeswax and mineral oil again.  I had done so much extra sanding today that it made sense.  But this is the finished display.  The boyos seem pleased.  Hopefully, it will show off knives well at the Butchers' Ball.  I will be coaching so I will not know.

I actually do enjoy the sanding.  I just wish I had had more time to think this out better.  But in the end, it looks nice.

Tuesday
Oct152019

wool dryer balls

I prefer to hang dry clothes.  I do have a dryer though.  I was kind of talked into it.  But I do use it occasionally.  Especially if thunderstorms have rinsed the clothes on the line three times.

But I do not like the dryer sheets or liquid fabric softeners.  It is both the how they make the clothes feel and the smells.  I do not like the smells.

I have been looking at the wool dryer balls and decided to make them.  The easiest way was to take a ball of wool yarn, put it in a nylon, wash it with a load of wash, and then dry it.  I have plenty of wool yarn but no nylons.  I had some napkins I could tie around the ball very tightly so I tried that.

I will say it worked quite well.  I made two, thinking I can make more as I go through my yarn basket, deciding what I wished to use or not.  One worked perfectly.  The other has a bit of a felted cap.  They actually still look like balls of yarn but behave like balls.

I have enough wool fleeces I was thinking I might try the same thing with a lot of fiber packed into my holey napkin.  That would be even easier then making the yarn first.  Maybe the next load of laundry.  

This was incredibly easy.  So easy I may make some for my Etsy shop or gifts.  Easy stocking stuffers are always a plus!

Saturday
Oct122019

A cinnamon swirl bread with a twist

My Beloved has been listening to a book about brain fog.  Which that type of book always makes my life very interesting.  It means that I may get asked for interesting ingredients added into our diet.  Or more of certain foods that we eat.  So far it has been easy.  More tea.  More berries.  More vegetables.  More cinnamon.  The cinnamon meant that I got asked to make a cinnamon swirl bread.

Usually when I make a cinnamon swirl bread it means that I use an enriched dough.  But there were no eggs in the house and I did not wish to go to the store.  I had seen a recipe for a simple sourdough that had added pumpkin.  I had recently roasted pumpkin in the refrigerator.  Why not?  I find adding oats or fruit or vegetable puree can take the place of eggs.  This time it worked.

I used my basic bread recipe with one cup of milk and one cup of water, one and a half cups of pumpkin, and a half cup of brown sugar.  It turned out really well.  I had one loaf with a cinnamon swirl and one without.  Life is good.

Pumpkin Sourdough

Note:  Use the best flour possible.  Heritage and/or organic if you have access or the pennies too.

sourdough starter

1 cup water

1 cup milk

1 cup whole wheat flour

1 3/4 cup blended roasted pumpkin (the smoother the better)

1/2 cup brown sugar

2 teaspoons salt

2 tablespoons butter

5 to 6 cups all purpose flour 

1/2 cup brown sugar

2 teaspoons cinnamon

In a large bowl, mix the sourdough starter, milk, water, whole wheat flour, and two cups of white flour.  Cover and let become bubbly.  It should look like pancake batter.

When it looks like pancake batter, take a scoop and refresh your sourdough starter that you kept back in the refrigerator or add 4 tablespoons of flour and 2 tablespoons of water to you jar of sourdough.  Mix well.

To the batter, add the pumpkin, the sugar, and the salt.  Mix in 2 cups of flour.  If the batter becomes a soft dough, start to knead.  If not, add another half cup of flour.  Turn the dough onto a clean floured surface and knead.  Knead until smooth.  Then, start kneading in the butter.  I smash the butter on the floured surface with my hand or rolling pin.  Fold it a few times before I start to knead.

Once the dough is a smooth bowl, I put it back into my rinsed bowl and let rise until double.  My day got away from me, so I actually flattened it back, reshaped it into a ball and let it rise again.

I took about two thirds of this dough and shaped it into a simple sandwich loaf.  Place into a parchment lined loaf pan.

The last third, I rolled out into a square.  I mixed the 1/2 cup brown sugar and cinnamon together.  Spread this mixture over the dough and roll into a log.  Place in a parchment lined loaf pan.

Let both loaves rise about another hour or until puffy and almost double.

Bake at 350 degrees Fahrenheit for 1 hour.

I am now wishing I had switched the larger loaf to the cinnamon swirl.  This week I will.

Friday
Oct112019

going for a blue green

As you may have guessed, my life is a bit mad.  But I have missed dyeing silk.  Part of it is I look at my clothes and think I could change that with dye.  Freshen it.  Make it something new.  I have to admit for my clothes I think a lot about black walnut.  A dark brown or black brown.  Or is that brown black.  I like forest tones.

I had a friend message me one night asking if it is true that you can make a blue or even turquoise with red cabbage if you add baking soda.  Yes because it is about changing the pH of the water.  I will tell you that I add too much baking soda the first time.

That is what you get when the water has a very base pH.

But I tried again.  Add some alum to help mordant the cloth.  Add one teaspoon of vinegar.  Add a small (like a tablespoon) of woad.

This is what looked like wet out of the dye bath.

This is how it looked after being machined wash.  I am thinking about picking up some of the aromatherapy laundry detergent I like which has a sea salt and see if it changes the colors when I wash it too.  But this is a silver.  A silver grey.  But I had the piece of silk sitting in the sun before I took pictures of it and it definitely has a blue cast.  I am thinking about what I can try next.  I do have a piece of silk sitting in a mint dye bath.  Currently, it is looking like swamp green.  Okay, really a grey green but it is October!

Koda Bear is helping with these experiments.  Which is pretty cool.  More experiments for me soon.  I do have a Hallows costume to make for this not so small bear.  I am going to make him help!