Entries in sourdough (47)

Monday
Jun292015

a swedish style rye bread

I have been having the urge to bake more and more bread.  There is only so much bread one household can eat.  I have been told to give it away.  

Saying that, fishes seem to be the other big thing that is wished for in our household.  Smoke salmon.  Baked halibut that is similar to fried.  Fried catfish.  Fish has been asked for for breakfast.  

After having a rye that was not flavorful enough out, I decided to see if I could find a simpler rye then I had found before.  Yes, it was very good but I like not having to have extra special ingredients in the house.

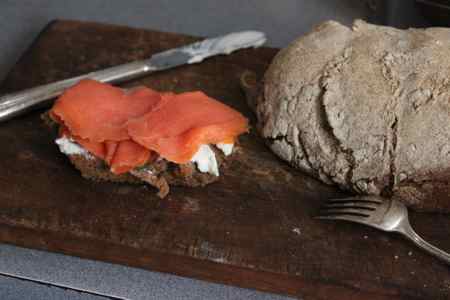
I found Swedish recipes for kymenlaakso.  They had other Swedish names attached but nothing translated well.  It is basically an artisan bread made with 100% rye flour, salt, and a starter.  And time.  Lots of time because there is not a lot of gluten in rye. 

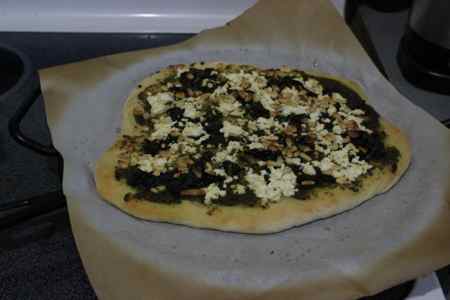
The resulting bread was not soft per see but it is moist.  Sliced thin it is chewy and flavorful.  With smoked salmon, cream cheese, capers, and thinly sliced red onion, life is pretty good.

swedish style rye bread

sourdough starter

3/4 cup water

1 cup rye

the rest of a 24 ounce bag of dark rye (I used Bob's Red Mill)

1 cup water

1 to 2 teaspoons of salt (this is to your taste.  experiment)

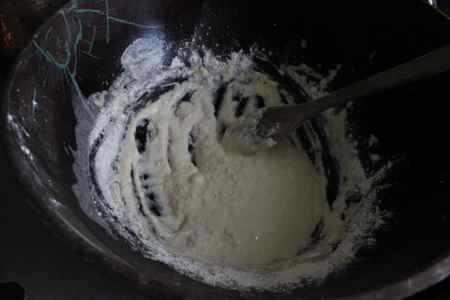
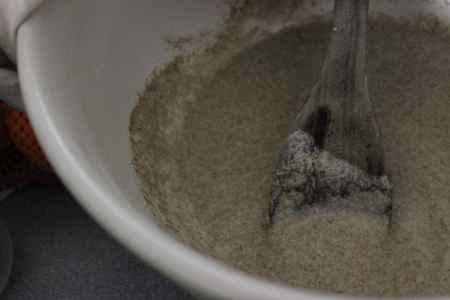
The night before, refresh the starter by mixing in 3/4 cup water and 1 cup rye.  Cover and let sit overnight or until bubbly.  Save a bit for next time (I use whatever I have in whatever bread I am making).

Mix in 1 cup water.  Mix in 2 cups rye.  Cover and let become bubbly.  With the rye having less gluten and no sugar, this may take a bit.

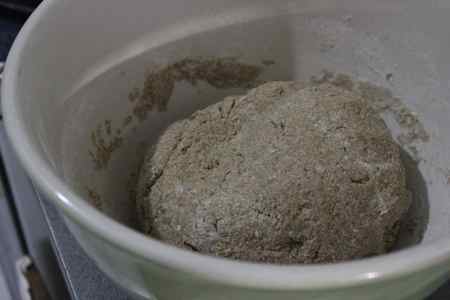
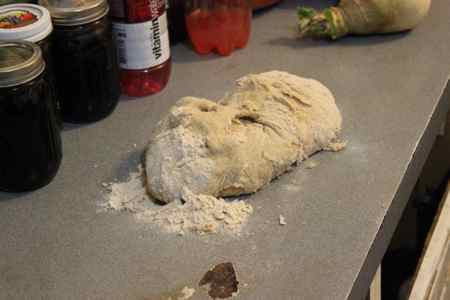
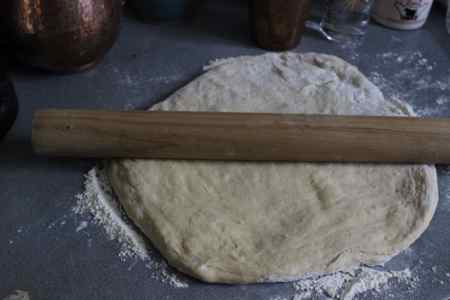
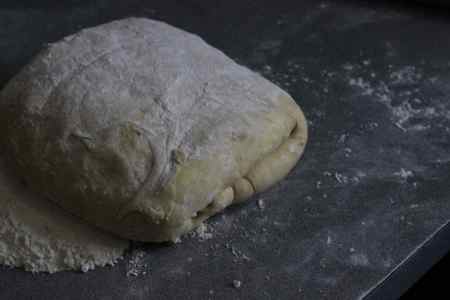
After the sponge gets bubbly, mix in the salt.  Mix in enough rye to make a soft dough.  Knead until smooth.  I found it took most of the rest of the bag of rye and it was a bit sticky still.  I did not wish to make the dough any stiffer.  

Cover and let rise until double.  This may take overnight depending on how stiff your dough is.  You can put it in a ziploc and let is rise in the refrigerator.  It will make the bread more sour.

Butter a large loaf pan.  Shape the bread to fit in the pan.  It will be sticky soft.  Cover and let rise until puffy.  This will take time.

Bake at 350 degrees Fahrenheit for 1 1/2 hours.

Yum.

Thursday
Jun252015

sourdough waffles

The boyos really like sourdough pancakes.  They are really easy for me so I have no problems making pancakes for them.  Or setting it up so they can add eggs and make them themselves when I am off at work.  But once in a while I do like a nice waffle.  I had been thinking that it would not be that hard to take my sourdough pancake recipe and switch it to waffles.  I have noticed that waffle recipes seem to increase the amount of fat in them.  I have always thought that is to try to limit sticking to the waffle iron.

I was on instagram last week and @local_milk had posted a picture of her sourdough waffles, giving an outline of what she did and saying she used Rhulman's ratios for pancakes as a base.  Like I thought, the basis was to increase fat and there I would have it.  I was actually thinking the flavors from my cornetti would also be good in a waffle, the orange and vanilla.  I was out of orange so vanilla it was.

May I say these were some of the lightest waffles I have had?  And I let them bake a bit so there was a crispness to them.  You do not have to do that but that is what I like.  Next time, I hope to have an orange in the house to give try.  That with "black sugar" (sugared berries, talk to Koda Bear about that name), so good it would be (we have a lot of Yoda around here).

sourdough waffles

sourdough starter

3/4 cup water

1 cup flour

1 cup buttermilk

1/4 cup melted butter

1/4 cup sugar

1 tablespoon vanilla

1 teaspoon salt

2 cups flour

2 eggs

1/2 teaspoon baking soda

At least a day ahead of when you wish to make the waffles, freshen the starter by mixing the starter, 3/4 cup water, and 1 cup flour in a medium bowl.  Cover and let sit at least 8 hours until bubbly.  Remove about 2 tablespoons of starter for your next sourdough experience.

In the starter, mix in the buttermilk, melted butter, sugar, vanilla, salt, and two cups flour.  Cover, let sit over night until you are ready to bake.

In the morning, heat up your waffle iron and oil they way that works the best for you.  While the iron is heating, mix the two eggs and the baking soda into the batter.  Let sit a minute.  It will grow on you.  Pour about a cup of batter per waffle into the iron.  Bake until it is what you like.  Like I said, I like crispy which is longer then most people like.

Serve with "black sugar" (sugared cut strawberries, raspberries, and blackberries).

Enjoy.

Update on my Grandmother.  The last I heard she was actually doing better but I have not received the latest update yet.  My Mother was supposed to go down and see here yesterday.  I do not know if no news is good or bad but prayers are still appreciated very much.


Tuesday
Jun232015

everyday bread

I have been thinking for some time that I need to write down my current every day bread recipe.  When I was getting texted about the the time I was getting ready to go to bed about what the next steps were, that made the decision for me.  My everyday bread is based on the Tassajara Bread Book (by Edward Espe Brown) pastry recipe but it is every changing for what I put in it.  When Koda Bear is eating jam sandwiches on a regular basis, I put an egg in it.  If I have heavy whipping cream that might be turning soon, that is fluid in the recipe.

I started laughing at myself because I was thinking this recipe is very fluid.  Right after the last sentence.  It truly is but this is current stopping place.

everyday bread

Note:  I will put my some of the possibilities in the ingredient list.  Depending on what  you put in the dough will change the amount of flour you need.  My french bread style. 

sourdough starter

3/4 cup water

1 cup flour

1 cup milk (this could be water or non-dairy milk or buttermilk or heavy whipping cream)

1 egg

1/4 cup sugar (white or brown)

1/4 cup butter (or another oil, I use olive a lot)

2 teaspoons salt (this can vary but bread tastes very bad without salt unless you were raised that way!)

5 cups flour.

The night before (or morning), mix the starter, 1 cup flour, and 3/4 cup water in a large bowl.  Cover.  When it is bubbly in the morning, take a couple tablespoons out for next time.

To the starter, add the milk, egg, sugar, and butter.  Mix well but do not worry about butter lumps currently.  Mix in two cups of flour.  Cover and let get bubbly and the dough raises.  This may take an hour or two in a warm house. 

When bubbly, mix in the salt.  The butter should be soft enough to start to break up.  Mix in two cups of flour.  The batter should be becoming a soft dough.  You want a dough that is stiff enough to knead but still very soft.  Add a bit more flour possibly.  Turn out onto a clean floured counter or in a bread trough and knead until smooth.  Place in a large bowl and cover.  Let rise until double.

Punch down.  At this point you can shape or let the dough rise again.  The second rise actually makes the bread keep longer.  I normally do and it takes another couple hours (covered).

Butter a loaf pan or two, dependent on the size of the loaves you wish.  Shape the dough to fit in the pans.  Cover and let rise until puffy.

Once puffy, put the loaves into a 350 degree Fahrenheit oven and bake for 1 hour.  I do not preheat which is part of why the length of time for the baking.

Enjoy!

Wednesday
Jun172015

good bread with stuff on top


When I start talking about pizza, my Beloved tells me I do not like pizza but good bread with stuff on top.  When I talk with Mr. Bert, who lived in a heavily Italian immigrant area in New York City, he tells me it is pizza.  Good crust, smoothed with olive oil, vegetables, a little cheese maybe.  High heat.  It is what Mr. Bert considers pizza. 

I told him I was going to recreate a pizza I had out recently:  spinach, pine nut, and feta.  He drooled.  I would have to say the pizza I have out has olives on it instead of pine nuts but I do not really care for olives.  Olive oil, yes.  Olives, no. 

This was incredibly tasty.  I ate half the pizza which is really too much.  But if you only make pizza once every couple of weeks, you can a couple extra pieces.  I also admit that I have never really liked cold or reheated pizza.  I am very strange.  But then, I do not eat pizza with red sauce in most cases and I did not eat pizza with any regularity until I started making it myself.  Everyone else in my life really likes pizza with red sauce.

spinach, feta, and pine nut pizza

1/2 recipe pizza dough

1 pound spinach, well washed and chopped coarsely

1 teaspoon ground pepper

4 cloves garlic or roasted garlic, minced

4 tablespoons olive oil

1/4 to 1/2 cup pine nuts

1/2 to 1 cup feta

Preheat oven to 500 degrees Fahrenheit.

In a skillet, heat two tablespoons olive oil over medium.  As it wilts, add in the garlic.  Once it has wilted and much of the water has cooked off of it, add the black pepper.  Take off the heat.

Roll out the pizza dough into a round that fits your pizza pan.  Or rectangle for a baking sheet.  Cover the pizza pan with parchment paper, put shaped pizza dough on it.  Smooth with two tablespoons olive oil.  Spread the spinach mixture over it.  Sprinkle with feta, to your taste.  Sprinkle with pine nuts, to your taste.

Put in the preheated oven for 17 minutes.

It will be golden and smell wonderful when it is ready.  The feta does not bubble.

Be careful not to burn your mouth when eating.  It is delicious.

Tuesday
Jun092015

cornetti

Obviously, I have been on a search for a croissant I like making at home.  I was browing though pinterest and came across a picture of something that looked like a croissant but was not.  A cornetti.  An Italian pastry similar to a croissant.  With the description of the pastry and reading through the recipe, my thought was I needed to try this.  One of those that I really did not wish to wait until the weekend because I did not wish to wait that long but it would makes sense for timing.  So I did.

And why have I not found this before?  I am not going back to French croissant recipes.  This had vanilla and orange in it with a lightness that was not dry.  Just lovely.  I talked about them to Mr. Bert while I was making them.  He grew up for part of his childhood in a neighborhood in New York City that was full of Italian grandmothers.  He said to add a bit of cinnamon.  I will have to try that at some point.  Might even do that with the vanilla and orange.  

I was thinking about making more this weekend even though I have not finished all I made last week.  That is telling too.  More butter and flour for the grocery budget.  Oh well!  That is just part of my life.

cornetti

Note:  This has other names as well if you search Italian croissant.  All similar.  I modified Milk and Honey's recipe to use sourdough as the yeast.

sourdough starter

1 cup flour

3/4 cup water

1/2 cup milk

5 tablespoons granulated sugar

2 1/2 tablespoons butter

1/4 teaspoon salt

2 eggs

finely grated zest of one orange

1 tablespoon vanilla

about 5 cups flour

8 ounces butter

1 egg, beaten

sugar for sprinkling

The night or morning before, mix sourdough with 1 cup flour and 3/4 cup water in a large bowl.  Cover and let get bubbly.  When bubbling nicely, remove a couple tablespoons of starter for next time.  This is what is known as a bigas in Italian baking.

To the bigas, add milk, 5 tablespoons sugar, 2 1/2 tablespoons butter, 2 eggs, orange zest, vanilla, and two cups flour.  Cover and let get bubbly.  An hour or two.

To the sponge, add the salt and two cups flour.  You should have a stiff soft dough.  It will be very rough.  Turn out onto a counter and knead.  You wish a smooth dough like a baby's bottom and adding as little flour as possible.  I find keeping my hands clean helps.  Place in a clean bowl (clean out the one you have been using, big chunks gone is okay) and cover.  Let rise about three hours or put in the refrigerator for overnight.

About 20 minutes before you wish to start working with the dough again, take out the 8 ounces of butter to soften slightly.  Flour a clean surface and pull out your dough.  Make a square and start rolling.  Smush the butter into a similar square and put in the center of the dough.  Pull the corners of the dough into the center, covering the butter.  Seal the edges of the dough.  Roll out into a large rectangle.  Fold into thirds the long way.  And then, turn and fold into thirds again.  Put into a large plastic bag and put in the refrigerator and let rest for 30 minutes.  

You wish to do this four times total.

After the fourth chilling, bring the dough back out onto a floured surface.  Cover two baking sheets with silpats or parchment paper.  Roll the dough out to about a 1/4 inch thick rectangle.  Long and thin is what you are going for so you can cut sixteen triangles.  I had to roll out a rectangle I actually cut in half and then triangles due to Koda Bear's help and the size of my counter.

With each triangle, stretch the long edge and roll to the point.  Place on a baking sheet.  Due this to all the triangles.  Cover and let rise about an hour or until puffy.

Preheat the oven to 400 degrees Fahrenheit.

Take then beaten egg and brush on all the cornetti.  Sprinkle with sugar.  I used a Mexican sugar that is not completely refined but not raw either.  Just pretty.

Bake for 20 minutes or until golden.

Grab a cup of tea or coffee.  Enjoy.

I need to make these again.