Entries in recipe (502)

Sunday
Jul012018

tacos al pastor

The tacos.  Tacos al pastor.  How did they turn out?  One of the boyos thought they were some of the best he ever ate.  I will tell you I cheated.  I used beef instead of pork and I put the meat in the slow cooker with the marinade.  To get bits of crispy, the meat was put under a broiler after it was cooked so tender that it could be shredded with a spoon.  Much nicer then going out for tacos!  

I keep threatening that I am going to make barbacoa next.  It may be a poke bowl though.  I wish raw fish and rice.

tacos al pastor

10 guajillo chiles, seeds removed

2 chiles de árbol

1 pound chuck roast

8 garlic cloves, peeled

1 cup vinegar (I used a homemade vinegar that was rather fruity.  It had started as a fruit kombucha)

¼ cup sugar

3 tablespoons achiote paste

4 1/2 tablespoons salt

1/2 pineapple cored, and sliced into chunks

1/2 onion, roughly chopped

Put both types of chiles in 2 cups water.  Bring to a boil.  Turn off heat and let soak for half an hour.

Put the meat in the slow cooker.

Pour the chiles and water they soaked in into a blender container.  Add everything else.  Blend about ten minutes.  Remember, I over blend.

Pour over the meat in the slow cooker to all but cover.  There should be extra which I put in the refrigerator for the next time I made tacos (yes, this has already happened so I cannot say how long it keeps.  But I had live vinegar yeasty beasties so it could have gotten very interesting).

Turn the appliance on low and let cook at least 12 hours.  High if you wish it to go faster.  The meat should be shreddable with a spoon.

I crisp it up in under the broiler.

Serve it on a tortilla or mjustat with pineapple salsa and cabbages.  I have actually been grilling my mjustat recently.  The boyos also ate this on salad and said it was the best!  Other words and noises were used but I do not have to repeat.

Goodness there are a lot of links to my own recipes!  

Thursday
Jun282018

achiote paste

I have been eating out about once a week lately which is not very like me.  Part of it is Monday is an errand day for me.  Part of it has been business.  Part of it is trying "the best" tacos in town.  Most of the reviews are what are called around here "yuppie" tacos.  I have learned my favorite tacos are normally authentic to the Mexican culture.  It can be tweaked a tad but true to a Mexican heritage.  It also did not help that there is a new restaurant around the corner that has good tacos but yuppie prices.  Nothing cutting edge, just tasty.  Price was ouchy.

I like Tacos al Pastor.  They are usually made with pork which I can react to so it would be better if they were made with beef for me.  Or grass fed pasture raised hog.  Having inflammatory conditions make you more sensitive.

I did the research and realized that I was going to have to make the things to make the things.  Sounds about like the rest of my life and choices.  I needed achiote paste.  Other then collecting all the ingredients, it was quite easy.  I followed the Bon Appetit recipe quite closely.  I did use homemade vinegar instead of white distilled.  There is a fruitiness to it.  I also have the tendency to blend everything much longer then recipes call for.  I find it does make a difference.  Usually in a positive fashion.

I am also going to say that I am always surprised how the same spices are used across different cultures.  The spices in this Mexican dish are very similar to the spices used in my Swedish and Norwegian recipes.  Just different amounts.

achiote paste

3 whole cloves 

1 bay leaf

1/4 cup ground annatto seeds (I could not find whole which is what the recipe calls for)

2 teaspoons coriander seeds

2 teaspoons cumin seeds

2 teaspoons dried Mexican or Italian oregano

1 teaspoon black peppercorns

1 teaspoon coarse salt, I used Himalayan

4 garlic cloves

1/4 homemade vinegar (or distilled white vinegar)

zest of one lime

zest of one orange

In a blender (I have a small attachment to my immersion blender which worked very well), put all the ingredients up to the garlic cloves.  Blend on a high speed until finely ground.

Add the garlic cloves, one at a time, and blend after each.

Add the vinegar and blend.

Add in the citrus zest and blend.

This makes a very thick paste.  Not all of it is needed to make Tacos al Pastor so put it in a jar and store it in the refrigerator.  

I am actually making tacos al pastor again today.  There have been three meals of it so far this week.  But I have not had to use anymore of this paste.  It goes a long way.  It has a savory meaty flavor.  It would probably be very good added to other things but I have not tried.

Thursday
May242018

one of the many french style breads

Obviously, when I got back from camping I had milk that was going bad.  Drinkable but it tasted just a bit off.  I also needed bread.  

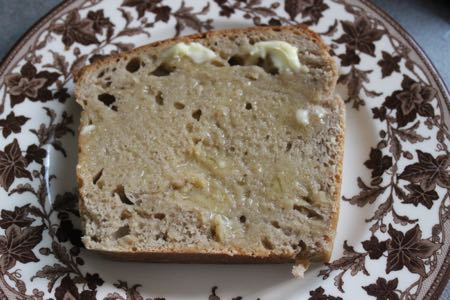
I have been wanting a French style bread.  The boyos really like the oatmeal.  I could have made the oatmeal bread with the milk.  Not a problem.  I just wanted something a little different.  I like a French style bread with butter and jam.  A bit drippy but not holey.  Which is why I say French style.  I do not wish a crust that cuts my mouth and I want enough bread to hold the butter and jam and not fall on the plate.  I can make the artisan style breads.  I chose not to because I want the jam and butter to be on the bread not running down my arm.  It sounds so picky but is true.

I went through the Bein Cuit cookbook to be inspired.  There was a French style loaf with milk and olive oil.  I have to admit I quite like it.  Here is where it gets really silly.  I looked at the proportion of measurements, realized they were very close to Chris Bianco's pizza dough measurements and went from there.  It is really how simple bread is to make.  Please try it!

I have actually made this bread again already with the whey I saved from straining the yogurt.  Again, so good.  There is a a half a loaf left and I am told bread is needed.  Partially because the boyos have said there is a need for bread pudding with rum sauce.  This is my life.  There are many times where I do not feel like i am not getting anything done but it is because I am always making and doing!  I just laugh. 

Eat bread, butter, and jam.  This is a good starting place.  Ask questions if you want!

I also realized as I reread this post that words, fingers, and keyboard are not necessarily working very well.  Ask questions if I am not clear please!  I just have to laugh at myself.  Time for more tea.

French style bread

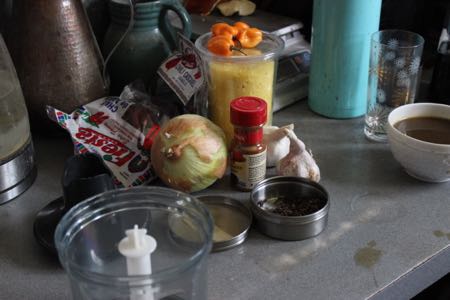
Note:  Used ideas from Zachary Golper of Bein Cuit and Chris Bianco of Bianco.  It is bread.

a couple tablespoons of sourdough starter (I then add flour and water to my sourdough jar to refresh it for next time)

1 cup water

1 cup milk or whey

1/4 cup olive oil

5 cups or more of flour
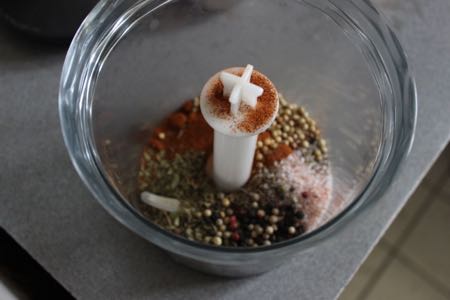
2 teaspoons salt

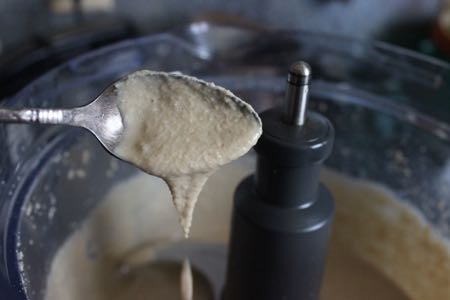
In a large bowl, place the starter in a large bowl.  Add the water, milk, and olive oil.  Mix in 3 cups of flour.  Stir really hard.  Cover and let sit until bubbly.  Starting with cold starter and cold milk, that is four to six hours.  Maybe even eight depending on the temperature of your kitchen.  No, I do not warm my milk.

Once the batter is bubbling, mix in the salt.  Mix in almost two cups of flour.  My flour is very fresh and very moist so I actually need to add almost another cup of flour to get a smooth dough.  Mix in the two cups of flour until there is a rough ball.  It will probably still be sticky but knead it until smooth.  Get your hands in.  Add as little extra floor as possible because the higher the water content of the dough the lighter your bread can be.

When the bread is a smooth ball, put back into a bowl and cover.  Come back in about an hour, flatten, fold into the center, and make another bowl.  Do this three times.  After the third time, or I am ready to go to bed, I put the ball of dough in a plastic bag and put it in the refrigerator.

The next day, I line a loaf baking tin with parchment paper.  I take the dough out of the refrigerator and shape into a loaf shape.  I put it into the tin and cover.  I let it proof until double.  Or the fingerprint pressed into it does not bounce back.  My kitchen, this can take eight hours.

Once it is at this point, put the loaf into the oven.  Turn the oven on to 350 degrees Fahrenheit and back for one hour.  It should be golden and sound hollow when the bottom is tapped.  If it is not proofed enough, the center will be doughy and it will never truly bake.

Bread.  Good basic bread that used milk that was souring.  It is good with fresh milk and whey too!  I am starting this bread this afternoon.  I will probably bake it on Saturday.  That is how my timings work.

Tuesday
May012018

hummus

The tahini I made was for hummus.  The request from the boyos.  I actually need to make more hummus but I am waiting on beans.  I ordered them because that is just how good the Rancho Gordo beans are.  They are some of the most expensive beans you can by on the market but well worth it.  They cook fast too because they are so fresh.  My problem with garbanzo beans from the bulk section of most stores are they are so old it takes forever for them to cook!

The hummus was actually quite easy and so tasty!  

hummus

Note:  You can add other things if you wish.  I am going to try a black bean hummus at some point.

3 cups cooked garbanzo beans (500 grams) (2 cans)

Juice of three limes (it was what was in the house!)

1/4 cup tahini, well stirred

1 head roasted garlic

2 tablespoon olive oil

1/2 teaspoon whole cumin

1/4 teaspoon salt or to taste

4 to 6 tablespoons water 

olive oil, salt, and paprika for serving

The first thing I did, was I peeled the garbanzo beans.  Yes.  Took the time to take the skins off.  It just makes a much smoother hummus.  I put an audible book on and did it.  Gift from the Sea by Ann Morrow Lindbergh.  

Put the garbanzo beans in a food processor bowl.  If you do not have a food processor, blender or pestle and mortar.  The goal is to get everything as smooth as possible.  It is one of the few things I like my food processor for.

I then put everything but the water in the processor bowl.  Squished out the roasted garlic cloves.  Squeezed the limes.  Put in whole cumin because it was what I had.  I processed for about 7 minutes.  I then added the water.  At this point, I had one of the boyos taste for salt.  He said the 1/4 teaspoon was enough especially since it was going to be eaten with crackers.  But that is all up to you.

I got what you see in the first picture.  After refrigerating the hummus, I would have used the six tablespoons of water instead of four.  But I think that has everything to do with how creamy and loose you prefer your hummus.  Or how strong your dipping crackers or chips are!

I am making this again as soon as the beans are delivered.  Maybe homemade is not as cheap as store bought because of the quality of beans I use but I would say it tastes better.  Great snack, lunch, and traveling food.  Also gluten free which has come back into my life.  One of the boyos.

Saturday
Apr282018

tahini

I think this week is only getting crazier.  But it is all first world problems.  My phone ringing too many times from an old company.  The washing machine not draining.  This is first world.  A cup of tea.  A slice of toast.  Maybe even an adult beverage.  It is all better.

Recently, hummus has been a huge life saver while traveling.  Whether it is across country or just for a MotoGP weekend.  Only buying one meal at an event because there is hummus and crackers in the car for when you leave is huge!  I usually travel with food anyhow, even if travel is just errands.  If it is more then my normal library errands I have at least a piece of fruit with me.  It builds from there but hummus and crackers are definitely a potential.  There was leftovers from camping and the boyos decided they really liked lunches that were centered around it.

I got online and ordered chickpeas from my favorite bean company.  I also looked to see if they carried sesame seeds.  They do not.  I planned to make my own tahini.  With the right tools, ever so easy.

I purchased about 3/4 pounds of sesame seeds.  I toasted them in a dry cast iron pan for about five to ten minutes.  That is all up to you.  How toasty tasting do you wish your tahini?

I then put the toasted sesame seeds in my food processor.  Just the regular blade.  I turned it on and in about three minutes I had this meal textured mass.  

Since I make my own fermented mustard, I know that something special happens after the seven to ten minute mark.  The recipes I read said that you may wish to add oil at about this point.  I decided to turn the machine on again.

Magic happened.  I had runny smooth tahini.  At this point, I tasted it to see if I wished to add salt.  I knew I was going to add some salt when I made the hummus, so I decided not to.  Three quarters of a pound of sesame seeds made just over one cup of tahini.  Really made for good hummus.  It will make lunches easier.